
Adding a document to your webpage can often be a tricky conversation. Before you upload a document to your site, ask yourself these questions.
- Should this document be live text on a webpage?
- Does the document already exist somewhere else on the website?
Often, we have information that is too big or detailed to be hosted on our website. Our Editorial Style Guide recommends information be in primarily in HTML format, e.g as live text on the website. When this is not possible our content management system (CMS) allows for documents to be uploaded. File formats available to be uploaded include PDF, Word, Excel, PowerPoint.
Are you ready to add your document to the page? Follow these steps to get started.
Creating a new document asset
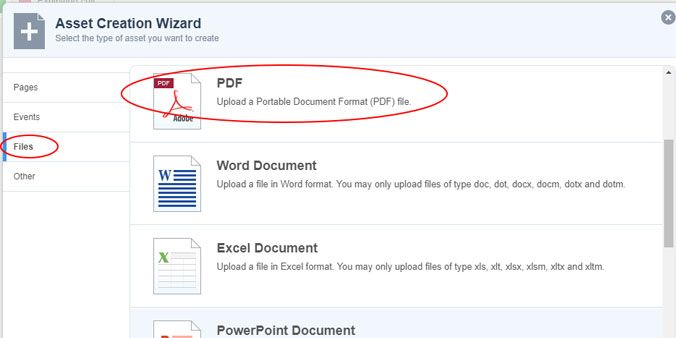
- Click ‘New’ to bring up the asset creation wizard
- Select ‘Files’
- Select the document type you would like to upload (e.g. PDF)

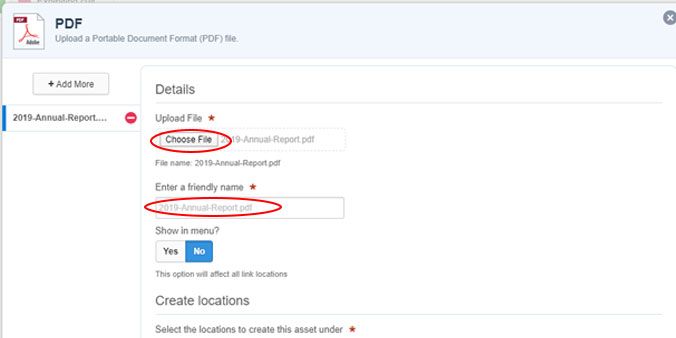
- Select browse and find your file to upload
- Enter a friendly name (this name will appear as the asset’s name in the asset listing)
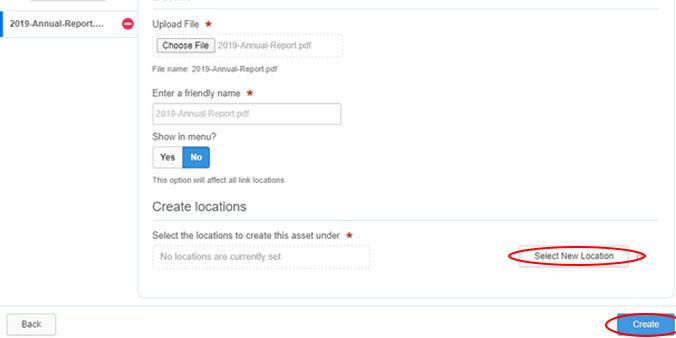
- Click ‘Select new location’ for the file
- Select the location where your document will live (the documents folder in your website)
- Click Create
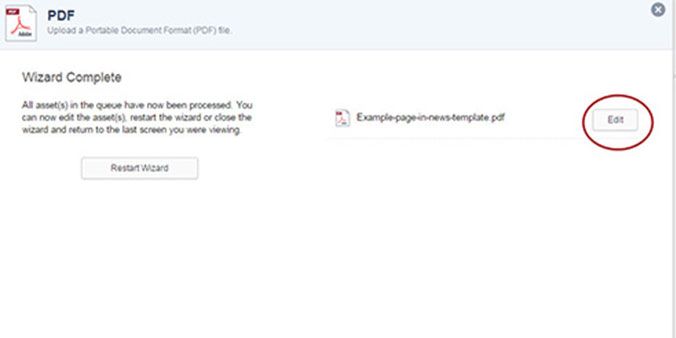
When you click create, you will receive a ‘wizard complete’ prompt.
Your asset is now created but won’t be live. You must make a few updates first.
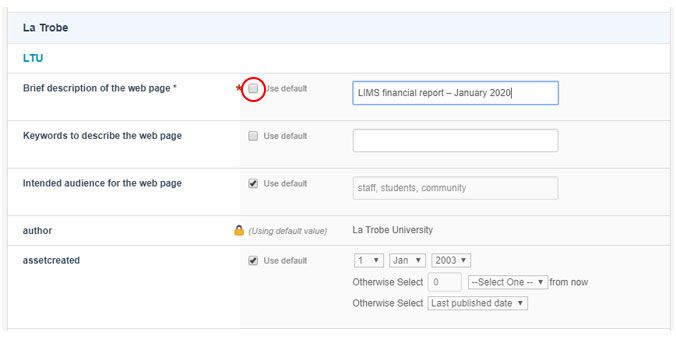
Adding metadata
- Click ‘Edit’ to enter the easy edit mode of the asset
- Select the ‘Metadata’ tab

- Uncheck the ‘Use default’ selection for ‘Description’
- Add a description to the file (e.g. LIMS financial report – January 2020)
- Click ‘Save’
- Click the ‘Details’ tab
- Under ‘Status’, select ‘Approve and Make Live

- Click ‘Save’
- Publish


Updating a document
Have a new version of a document that already exists on the website? We can easily update the existing asset without needing to update related hyperlinks.
- Find the asset you would like to amend
- Enter _/edit after the URL
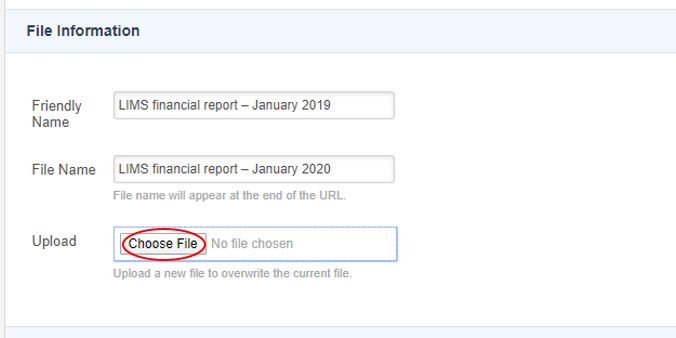
- Click the details tab
- Switch to Safe Edit Mode
- Under file information select ‘choose file’
- Update the friendly name if applicable (Financial Report 2019 to Financial Report 2020)
- Change the status to ‘Approve and make live’
- Save
- Publish
- Clear cache
Note: You can only update documents with the same file format. (e.g. PDF to PDF, Word document to Word document) If you need to update an asset with a different file format you will need to upload the file as a new document asset.
Best Practice for uploading documents
- a maximum file size is 8MB
- ensure document file names represent the document. (Annual Report 2018.pdf not PDFExport_120719.pdf)
- use the asset ID when linking to documents
- when linking to a document include document type and size. (e.g. Annual Report [PDF 1MB])
- university documents should be hosted through our CMS. Not externally e.g. Dropbox.
Have questions about your web editing?
Remember, we’re always here to help! To reach out, please: